- Bernard Preston homepage
- Solar geek
- Passive Solar Water Heater
Passive solar water heater
Passive solar water heater works on the thermo-syphen principle and may be aided by a small pump.
This page was last updated by Bernard Preston on 23rd May, 2021.
Planning your project takes a little aforethought. Firstly, are you wanting to go green? Is the cost not a big factor? Or are you trying to save money by building a homemade geyser?
Where is the geyser going? We recommend on the roof rather than in the ceiling unless you live in subzero temperatures.
Table of contents
Introduction
I built my first homemade geyser some thirty-years ago, and it worked tolerably well. They still use the thermosyphen principle; hot fluids rise by convection.
It rises from a glass covered collector to a tank that must be at least half a metre higher.
- Bernard Preston homepage
- Solar geek
- Passive Solar Water Heater
However, it wasn't terribly efficient and the copper pipes burst when cold weather set in. I would not go that route if I were you as the effectiveness of a modern passive solar water heater can be greatly improved by using vacuum-tubes at relatively low cost. They are about 20 dollars apiece; do not go any other way.
You will need an array of about 16 to 20 solar-tubes; always go bigger to cater for winter weather. The total cost is
about 1000 to 3000 dollars depending on taxes and the size of your installation. Something a lot more sophisticated is required in countries where the temperatures fall far below freezing.
There seem to be in the main two types available. German, perhaps made in China with a European sticker, and those manufactured in the PRC. We have one of each. The former is a good deal more efficient but is also more expensive and difficult to source except through a dealer.
I recommend the German tubes. I think made under the name Daimler. I just measured the midsummer temperature of the water; it's 80 degrees Celsius, roughly 180 Fahrenheit; that's hot.
A solar pump has some merit.
And, whilst a passive solar water heater works, I was astonished how much more efficient my homemade geyser became when I added a small inexpensive pump energised by a PV panel.
Costing around $60 + a 10W PV panel of around 30 dollars that drives the solar pump only when the sun shines. For less than 100 dollars you will be well pleased with the greatly improved temperature of your shower!
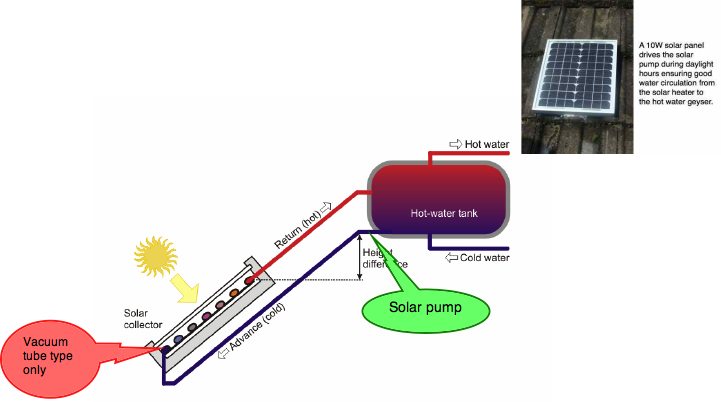
Here's the basic solar system project.
Passive solar water heater
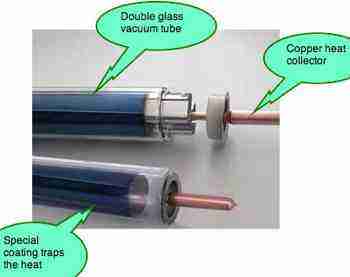
Passive solar water heater uses these inexpensive vacuum tubes.
Now I have a one-year later update. Having praised the solar pump, I think it needs
further development. There are two options; a brass version which is very
expensive, and a plastic one that is a quarter of the price but has
limitations. Noise, incompatible with general brass fittings, and ours
leaked, flooding the roof, and only a six month guarantee. I wouldn't
recommend it. But, if your tank geyser is in the roof, and not much above
the solar tubes, you have no option.
The water in the manifold gets boiling hot, literally, and the sooner it cycles into your tank, the less the losses. But the thermosyphen works extremely well if your geyser is on the roof, if the length of pipe from the solar tubes is short, and the height difference at least 300 mm.
This is how you would construct your passive solar water heater.
Firstly, you need a special geyser or hot water heater tank that has two extra inlet and outlet pipes for the liquid to pass to the solar tubes.
Or, alternatively, an auxiliary tank from which the main geyser draws hot water. Ideally, the right time to install your homemade solar heater is in a new house, or when the unit needs replacing in any case.
These high pressure geysers don't seem to last more than five to ten years.
Having purchased your manifold and solar tubes, the first step is to assemble the frame on the ground.
Having assembled the frame, carry the whole onto the roof, minus the tubes, and position it as close to, but as low down on the
roof as possible to increase the thermo-syphen effect. Choose a
south facing aspect in the northern hemisphere, and conversely in Africa where I live.
Ideally, if you live at 50 degrees north, you want
to angle the solar tubes to about the same, or a little steeper for greater efficiency in the shorter winter days; but most folk would simply choose
the pitch of the roof for convenience. Otherwise your frame has to be greatly strengthened.
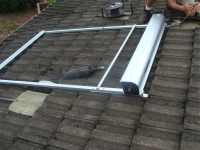
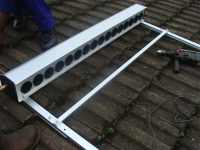
ATTACHMENT TO THE ROOF
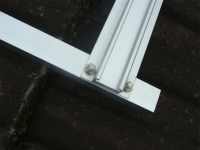
The whole structure must be firmly
attached to the roof. Remove some of the roof covering, in this case
concrete tiles, and firmly screw two aluminium straps to the underlying
roof trusses. Two for the top, and possibly also two extra for the
bottom if you have extra high winds. Firmly attach the straps to your
solar tubes frame.
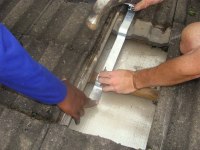
Having fixed the frame firmly to the roof, drill two small holes through the roof covering for the water pipes carrying to and from the solar tubes and the hot water tank.
These holes need to be carefully sealed with a membrane and sealing paint to prevent rain leakage into your house obviously.
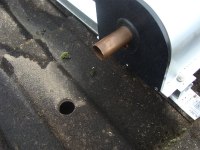
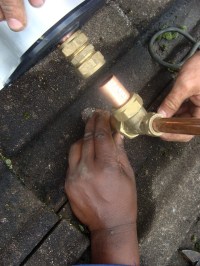
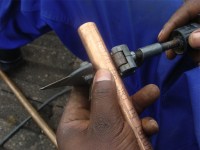
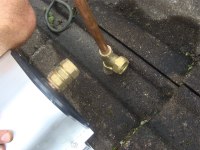
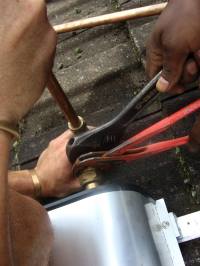
AIR RELEASE VALVE
Small air bubbles can collect in your solar system project, scuppering the whole exercise. A small valve allowing such air to escape is vital.
Purchase the correct plumbing fittings to connect to the solar tubes manifold, the valve, and the piping to the hot water heater tank.
Make sure everything is neat and tight.
Photo voltaic panel
Photo voltaic panels turn the energy contained in light into a usable source of electricity.
The solar pump must be driven by a 10W DC source. (Check your solar pump.) The simplest is a PV panel that will only come into effect when the sun is shining. Because the voltage is relatively low, the wire connecting the panel to the solar pump must be as short and thick as possible. Losses are high.
NB. The pump is DC and polarity is vital. Connect correctly to the panel, and to the pump.
Epoxy the panel to the roof.
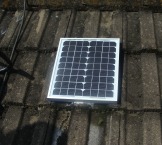
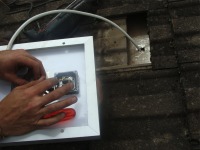
More about that solar pump.
Of course, once you insert a solar pump it's no longer purely passive. Let's call it an assisted passive solar water heater.
The solar pump naturally needs only to work during daylight hours, so it is driven by the 10W photo-voltaic panel. This greatly augments the thermo syphen affect and to my mind is an essential part of your system if your water tank is in the ceiling.
Newsletter
Our newsletter is entitled "create a cyan zone" at your home, preserving both yourself and Mother Earth for future generations; and the family too, of course. We promise not to spam you with daily emails promoting various products. You may get an occasional nudge to buy one of my books.
Here are the back issues.
- Lifestyle and ideal body weight
- What are ultra-processed foods?
- Investing in long-term health
- Diseases from plastic exposure
- Intensive lifestyle management for obesity has limited value
- A world largely devoid of Parkinson's Disease
- The impact of friendly bacteria in the tum on the prevention of cancer
- There's a hole in the bucket
- Everyone is talking about weight loss drugs
- Pull the sweet tooth
- If you suffer from heartburn plant a susu
- Refined maize meal and stunting
- Should agriculture and industry get priority for water and electricity?
- Nature is calling
- Mill your own flour
- Bake your own sourdough bread
- Microplastics from our water
- Alternative types of water storage
- Wear your clothes out
- Comfort foods
- Create a bee-friendly environment
- Go to bed slightly hungry
- Keep bees
- Blue zone folk are religious
- Reduce plastic waste
- Family is important
- What can go in compost?
- Grow broad beans for longevity
- Harvest and store sunshine
- Blue zone exercise
- Harvest and store your rainwater
- Create a cyan zone at your home
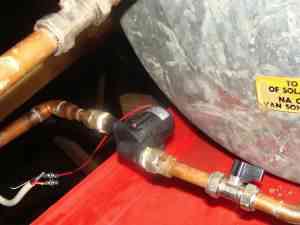
The solar pump note is connected to the cold water return. The liquid in your homemade heater can get extremely hot and long exposure to high temperatures may damage the device.
I confess I am not enamoured with the solar pump available in South Africa. It's made of plastic and we have had leaks. A brass one is also available but very expensive. Moving the water tank onto the roof definitely improved the whole performance.
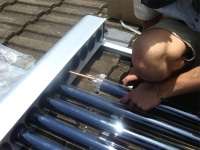
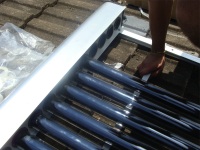
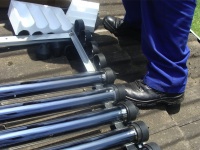
Fitting the solar tubes
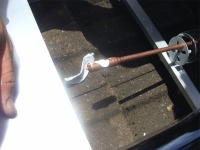
The heat from the solar tubes is
carried up this copper rod to the water in the manifold. Ensuring a good
seal and conduction a paste is applied to the end of the copper rod.
The solar tubes for your assisted passive solar water heater
are now fitted snugly into the plastic seal in the manifold housing.
DONE!
So, your passive solar water heater is complete. In a couple hours we will go down and test the water temperature.
It is hot! Plenty hot enough for washing the dishes. If you only use a dishwasher, make sure it is connected to the hot water heater; that alone will save you a bundle in electricity.
Geyser on the roof
A better option if you live in a country where it doesn't get bitterly cold (like northern USA) is to place the geyser on the roof. This certainly enhances the syphen effect, and does away with the solar pump.
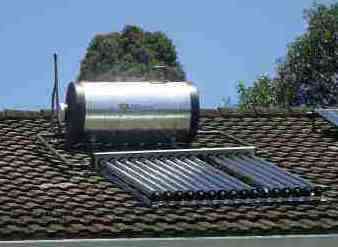
You will have noticed that one tube is missing. They have a vacuum jacket; if it fails, moisture gets into the device, making it cloudy. Ours was faulty from day one, and has been returned to the manufacturer for replacement.
Moving the geyser to the roof has greatly enhanced the effect of these solar tubes. I recommend it; do not place the tank in the ceiling. It is a bit unsightly, yes. We almost never turn on the electric power; twice in a whole year when there was extended inclement weather.
At solar geyser you can see how we have enhanced this passive heater in the winter months using power from the inverter, with the option of using prepaid electricity during wet weather.
Solar powered generator
The next step, of course, in your aim to utilise all the free energy donated to you daily by the sun, is to turn those photons into free electricity; it's the second most important step after your passive solar water heater. How is that done? Not difficult if you follow these principles... Solar powered generator.
Total electrical consumption
Using our passive solar water heater and a solar powered generator we have reduced our energy consumption to 153 kWh in three and a half months (I've just checked). Just a little more than one kWh per day, and that includes the Christmas period when a lot of baking was done. We have an electric oven and gas hob.
Installation of your solar generator panels
Installing your photo-voltaic panels is not difficult, with the help of a two friends. It took me four hours. You could also install your PVs yourself. Follow these instruction at Solar generator installation. It is all about gathering heat from the infrared portion for your passive solar water heater, and electricity from the remaining part of the spectrum.
Solar panels where there's no mains power.
Supplying high voltage current in the garden is both dangerous and expensive. Residential solar panels come in small sizes too, for example for the supply of the battery that powers this gate motor.
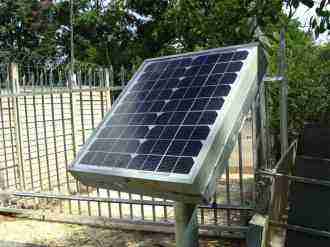
Solar power energy
Solar power energy comes for free, a gift from Almighty God, but collecting and storing it, and turning into a water heater and useful electricity takes some thought and planning; and cost.
Nevertheless it is an immensely worthwhile project, both to save money in the long run, and preserve the planet for future generations.
USEFUL LINKS to other Bernard Preston pages
Passive solar water heater. Did you find this page useful? Then perhaps forward THIS PAGE to a fellow HOME DIY ENTHUSIAST.
Bernard Preston
Bernard Preston is a retired DC with a passion for the environment, and healthy living. That means building a passive solar water heater to reduce the need for electricity, saving rainwater and growing his own vegetables.

Kale is queen of the table, rich in the carotenes lutein and zeaxanthine that protect our eyes against age onset cataracts and macular degeneration.
Did you find this page interesting? How about forwarding it to a friendly book or food junkie? Better still, a social media tick would help.
- Bernard Preston homepage
- Solar geek
- Passive Solar Water Heater
Address:
56 Groenekloof Rd,
Hilton, KZN
South Africa
Website:
https://www.bernard-preston.com
